Today, we take a look at this GTI Clubsport Sound Upgrade job that came into Studio Incar recently. Since day one, its unlikely that a Volkswagen Golf isn't booked in, owned or stored here for work. It's the one car model that seems to stay with us, regardless of the direction the business moves.
There's no denying the VW Golf is a classless, timeless design in any of its forms. Some more so than others, but I'm sure that will split opinion.

Introduction and Background
I think there are a handful of reasons why the VW Golf is so prominent in our business history. It's a model with a 40 year history, therefore, classic and new car owners all fit within the bill. We have show car owners with new and old models and they're an extremely popular daily car of which we have plenty in our portfolio.
Enough about our passion for Golf's in general and more about this special Golf GTI Clubsport Sound Upgrade Edition40. This one started its journey with us helping our client find a decent model for him to start a project. However, it has ended up becoming our own car due to a change of projects. It just so happened to be the right time and we couldn't be happier with it.

Project Brief - GTI Clubsport Sound Upgrade
There's no other way to describe this GTI Clubsport Sound System other than "complex." We have a lot of modules, all doing an individual job and all wired to work simultaneously via the new Alpine X902D-G7 Golf 7 specific head unit.
These modules can use the Alpine unit's main or split screen features. For example, we can use both front and rear cameras at the same time, whilst on the move or as parking cameras, albeit with a little bit of pinning out and rewiring.
Another example would be four HDMI sources working on a single HDMI input on the unit. This can be switchable from the deck and via a manual switch mounted in the centre console area.

Starting with all of the source products, we planned an orderly procedure for installation. Subsequently, with two wiring diagrams drawn it was time to start.
Here's a breakdown of what we would call the "source products"
- Sony RSX-GS9 High definition head unit
- Alpine 902G7 mk7 Golf direct replacement head unit
- Alpine Digital TV
- Alpine DVD Alpine front and rear cameras
- Alpine camera control module
- Alpine HDMI switching module
- Playstation 4 slim
- Target Blue-eye tetra police scanner
- Laser track flare
- Clifford G7 CAN security
System Integration
Primary Source - Alpine X902D-G7 Head Unit
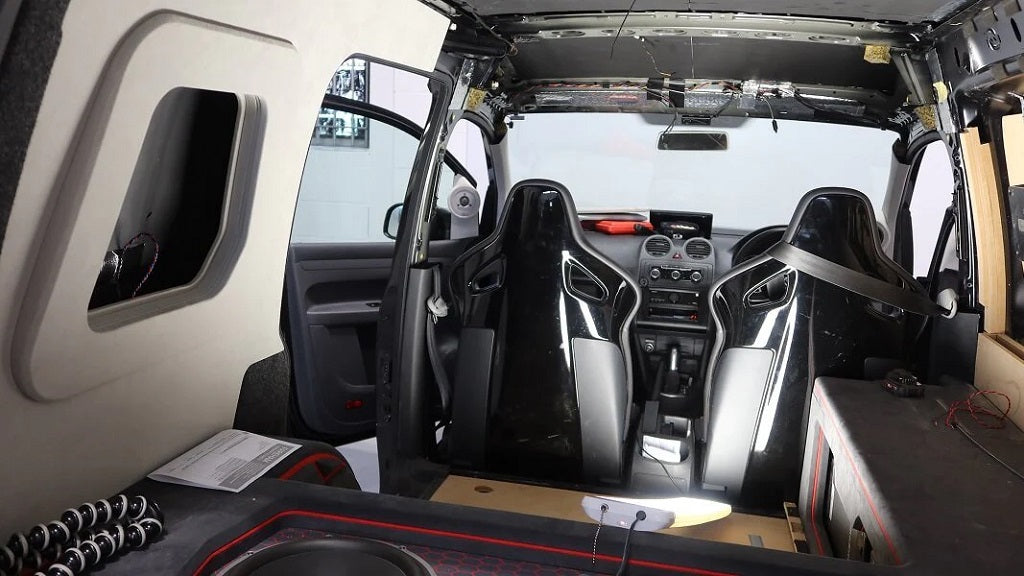
First in were all of the accessory sources, such as the DVD, TV and Playstation units. These are all fixed in place onto the sound deadened floor pan of the car with the seats removed. With all looming done and in its relevant position we installed the brilliant Alpine X902D-G7; a Golf mk7 specific head unit that upgrades the cars factory infotainment system ten-fold.

The Alpine X902D-G7 unit features:
- Apple Carplay
- Android Auto
- TomTom maps with 3 years subscription
- DAB & FM Radio
- Camera control amongst hundreds of other features.
The Alpine unit retains the cars OEM control features which are certainly an important feature for the customer and for us.
Secondary Source - Sony RSX-GS9
Installed as an indulgence source for higher end sound, the Sony RSX-GS9 is a High-Resolution media centre with various control of USB and Digital Audio Players and iPhone control. The unit uses an app to control a lot of its features, which helps because we mounted the unit in the glovebox.
In this installation, this unit is for those times when you're on your own. Therefore, the functionality is secondary, but most importantly, you want to listen to your music with the purest signal path.

Through some of Nick Williams' incredible editing here, you can see above, the glovebox lid closed with the unit sat in place of the VW infotainment unit no longer needed with the Alpine. Inside the glove box, there are two controllers discretely mounted. These are for the Laser Track Flare and Target Blu-eye systems. Both units contributing to keeping our client points free on his license!
We mounted them in this position so as not to be a distraction whilst driving. Additionaly, both units have a loud enough audible output to allow early detection of emergency service vehicles and possibly block laser-based speed traps. Oh, and open garage doors, of course!
Fabrication and Sound Deadening
We deadened the car and panels using our Skinz deadening package. After that, a partial rebuild of the interior of the car, such as carpets/seats etc enabled us to move forward. We don't have many pictures here without switching to phone pics. You'll just have to trust that we did a serious job of baffling the doors, deadening them and installing the excellent Gladen Audio Aerospace midbass units.
We fitted Gladen Audio SQX165 components to the rear doors and were dialled down to nearly nothing. However, this allowed for an "all round" tune setting on the DSP when complete.
So, source units complete, speakers in place, door cards back on and all deadening complete it was time to shift our attention to the actual design and fabrication. The GTI Clubsport Sound Upgrade brief at first was free reign, however, this soon changed to try and keep a fair amount of space in the boot. This isn't a problem here, we aren't fans of completely removing the functionality of a car in the name of good sound. In our usual work we will try and install as discretely as possible.

Centre Console
After drawing up designs for the Sub Box, the measurements were sent to our fantastic metal guy Jim Carter to CAD and CNC our design. We then set our sights on the centre console. We modified the underside to help fit the Mosconi RCD controller and stripped this down to fit in the aperture for the cigarette lighter charge point.
Our initial idea was to separate the volume knob from the board and have the screen in the rear view mirror. However, the new infinity style VW mirror, as wonderful as it is, just wouldn't prove fruitful for this project.
Tweeters and A-Pillars
We completed the aiming for the A-pillar mounted Gladen Aerospace 80mm Midrange and 28mm tweeter. After that, we fabricatied and trimmed the A-Pillar with a scalloped face from the tweeter. Sounds easy when you put it like that, doesn't it? However, the results were fantastic.

On to the Boot Area
What we now had were a thousand cables and all with different duties. 5 amplifiers, two particularly high-end subwoofers, one large DSP, 3 distribution blocks and various other odds and sods to fit in the boot of a typical hatchback sized platform.
Amplifier Installation
Whilst we were stood there deliberating, Marcus (Sales) came up with the rather old-school idea of dropping the amplifier for the rear speakers in the boot lid and reinforcing the boot rams. This was almost brushed off at first as it just isn't our "feel", but the more we looked at the options and pro's/cons of the situation it actually stacked up very well.
In all of the time the amplifier was mounted in that area and the car being on display, only one person noticed it was there. The rest had to be pointed in its direction, which to me particularly, is a fantastic modification. Of course, the pictures make it look completely obvious and you kind of had to be there.

The amp is held in place by a sheet of aluminium bolted down to factory bolt points. A particularly solid mounting for this as it's location dictated. However, to allow passage through the factory grommets, we used smaller gauges of cable.
Sub Box Installation
The sub box had been with us a little while by now, all 65kg of it, without subs. This raised a few eyebrows with the speaker box purists, but we'd done the math. There's no way we'd spend this amount of someone else's money for a failure. However, the bass from this enclosure with the two Gladen Audio Aerospace 10 Subwoofers was nothing short of outstanding.
Aluminium is superb, but it certainly has no tolerance for anything. The shape you have is the shape you have unless you want to redesign. We knew this hence the design of the box and already had a plan for the fabrication.
Amplifiers....Continued
The mk7 (not the R model) has plenty of space under the factory boot floor line. We used this space to mount two Mosconi zero 4 amplifiers to run front midbass and subwoofers. One on left and one on right, bridged. The amps provide huge power for 4 channels especially when bridged. Above these, we floated 2x Mosconi A class 2 channel high-end amplifiers to run the midrange and tweeters actively.

We enclosed the units with fabricated panelling, with an open design for cooling, very minimalistic and trimmed in Alcantara to finish. To house and protect the processor we built side panels with a glass face. Then a matching blank for the driver's side of the boot to neaten things up.
This gives a very symmetrical, minimalist feel and retains nearly all of the OEM boot space. With the purpose built load cover in place, the line of the fabricated panels actually sits below that of the factory boot floor. However, this wouldn't have been possible without moving the 5th amplifier up into the boot lid.
Integration
During the GTI Clubsport Sound System install we tested that everything was working before we got too far ahead of ourselves. The first thing we did was fire up the Playstation and had a game of FIFA, which was nice.
We set up the DSP with 3 different settings:
- Aligned to the driver
- No alignment
- A fun setting with a few levels raised and safe crossover points for higher volumes to suit our clients' needs for a fun sounding system.
I think to date (Aug 2018) this is as far as we have been in a single platform and given the amount of equipment it would be quite easy to end up in a bit of a mess. I'm sure most will agree the car has come out very well indeed.
If you have a GTI Clubsport or even a Standard VW Golf and you're interesting and you want a system doing, please contact us on the details below:
- Email - info@studioincar.co.uk
- Tel - 01489 578951
As always all product supplied and installed in-house.
Many thanks to Nick Williams for his outstanding image work on our project once again. Enjoy the rest of his shots.


