We consider this Mercedes E400 Audio Upgrade one of our "Best Ones Yet". Take a look at our take on this Mercedes Burmester pull out.
Project Introduction
I'll admit, we get a little complacent with the scale of some of our projects. For example, this brand new Mercedes E400 Audio Upgrade project was a 6-week long booking. Unheard of in most professional environments, it's what we're geared to do. A far cry away from the 2-3 cars a day procedure. Projects of this size are what make up the majority of our business model at the moment. This is intentional and long may it continue!
Mercedes E400 - Interim Upgrades
We actually took delivery of this E400 coupe from the dealer on behalf of our customer, 5 weeks before it's scheduled booking date. Due to this early delivery, we decided to ship the car about a bit to have a few things done in the short term.
Prestige Motors in Horndean removed the ECU and sent it across to the US for mapping. A RennTech suspension module was also installed allowing us control of the factory air system via our laptop and the RennTech software. We also installed some subtle upgrade to try and make use of the downtime.
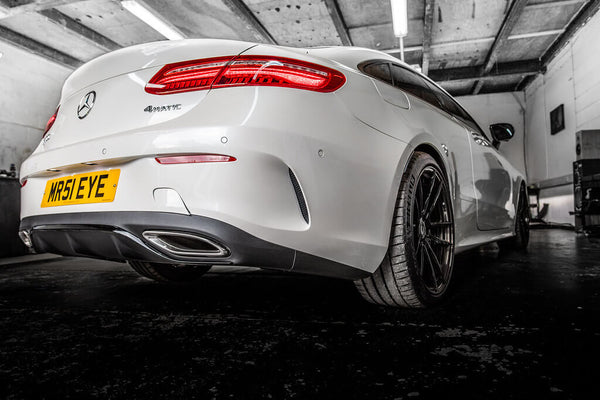
We ordered the wheels prior to the car's delivery. BC Forged HCA163 - 20" x 8.5" / 20" x 10" with gloss black centres and gunmetal lips/barrels. We had these wrapped in Michelin's top Pilot Sport 4S.
Mercedes E400 Audio Upgrade Brief
With these not-so-car-audio upgrades done, time was passing quickly. The car was away for a little longer than expected due to customs holding the ECU. However, it still managed to be back with us before the booking date.
James is a seasoned customer of ours, and as with most of our longstanding guys, now a friend. He can speak from experience when deciding on his system equipment and what he wants from it and its uses/compromises to the car. This helps projects run a lot cleaner. The deep understanding of what's required is something we try and hit every time.
Previous Car Builds and Listening Tastes
Bearing in mind the first system we built for James was the Audison Thesis SMAX. The second system we built was, at the time and likely still is the most complex system we've built, the Mk7 GTI Clubsport which we actually purchased further down the line. Between us listening to James' feedback and his ear becoming accustomed to a particular level, we should be consistently delivering the sound he likes. Bold, big, loud and most of all fun, which is great news for us, something often overlooked.
In short the brief was as follows:
- Visible components in the cabin to a minimum
- Maximise usable boot space
- High-level fabrication
- OEM integration Mercedes Burmester
- Toe-tapping fun sound
- The rest is up to us
Stage 1 Audio Upgrade - What are we dealing with?
The car has the Mercedes Burmester upgrade from stock and has been a great exercise for us in learning that system, its flaws and what we can do to overcome them. I won't go too far into detail. It's a common thread amongst our blog posts what these factory upgrade systems actually offer other than dealer mark up, and this system is no exception.
I will admit however, it's not as bad as most. This is more so due to the cars fantastic build quality. The OEM source unit also can sound really quite special. But the amplifier and speakers just really start to struggle past half volume and things get a little nasty.
OEM Digital Integration
The Mercedes Burmester system presents a couple of problems for an installer, one of which is its dedicated amplifier. We have the tools and products in our portfolio to grab the signal coming out of the 11 channel active amplifier, re-sum them back to a stereo signal and splice form there with our own DSP. However, it's not our preferred way, grabbing the signal on the input side of any OEM amplifier is how we'd prefer.
Herein lies problem two. The signal input is on MOST150 protocol and up until we started the project we weren't aware of a way to crack this. We posted about the beginning of the project on Instagram and Julien at NAV-TV contacted us. He informed us of the new Zen-M integration module for MOST150 cars inclusive of which is this model Mercedes.
If you're a pro and you have a Mercedes E400 Audio Upgrade booked in you would be daft not to use this module. It's incredible and retains all OEM features and delivering an excellent full range digital or up to 12 channel analogue output. You can assign different presets if you're not using DSP.
Digital Signal Processing - DSP
Our chosen DSP in this car is Audison's incredible BIT ONE HD. We believe this processor with its Finite Impulse Response firmware upgrade is (at the time of writing) amongst and if not the best processor on the market. It makes for light work for this DSP in this system. Running a four-way active front speaker system and sub bass. There are 9 channels in total, using all of the available output channels when in FIR mode. When in FIR mode the processor reassigns a lot of its processing power and has to remove the last 4 available channels.
We mounted the new DRC MP controller subtly in the front compartment, not losing a single cup holder.

Hardware Upgrades - Tweeters and Woofers
For this Merceded E400 Audio Upgrade system, James wanted to try us out on fitting a full 4-way active front end. Not something often done which I imagine is part of the reason. More than up to the challenge we started looking at top-flight kit to do the job. The brand that sat best with us would be Dynaudio.
New to Studio Incar at the time having only just secured the account. This would be a great way for us to start our path with this brilliant speaker manufacturer.
- Dynaudio Esotar 110 Tweeter
- Dynaudio Esotar 430 Midrange
- Dynaudio Esotar 650 Midbass
- Dynaudio Esotec MW172 8" Midwoofer
A four-way system in this car, bearing in mind the brief, presents a huge task in its own right. We managed to get the midranges and tweeters installed behind the factory door panels. Installed in a very particular way using different length machine fittings to accommodate their extra size amongst other things.
It was quite a gamble to place these here. We were of course ready to build a pillar mount system but wanted to stay within the brief. The gamble paid off and these excellent speakers play very well through the Burmester metal grilles. Always room to move them further down the line should we wish.
Mercedes E400 - Mid-Bass Installation
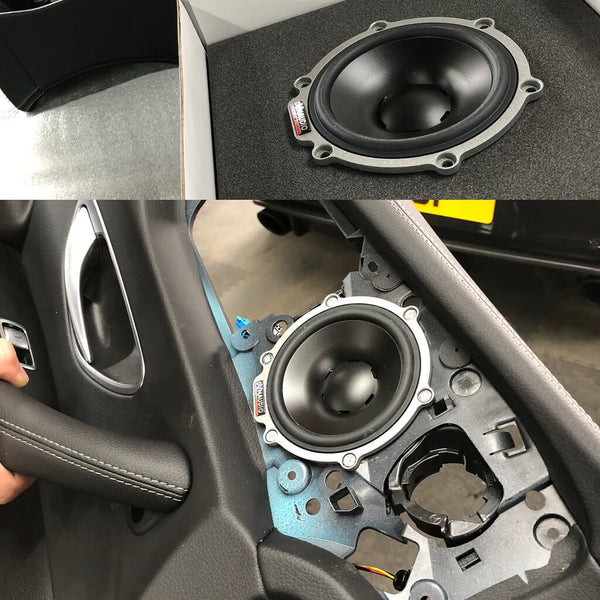
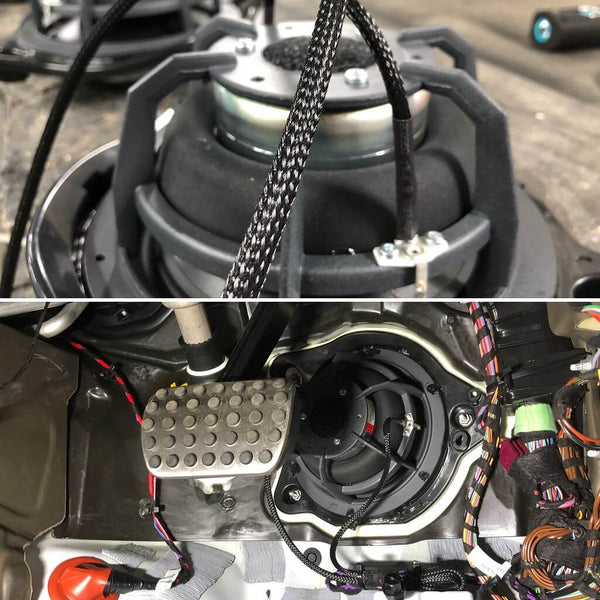
The factory midbass in this chassis is a dream location for car audio fans. Mercedes Burmester have done us a solid and created a sealed enclosure in the front firewall housing an 8" midbass. The Mercedes Burmester cars have them in stereo (left and right). Therefore, no Burmester cars have a single unit in the passenger foot space.
Whilst these are a great position for a solid midbass they're not simple to work with. We made the choice to invert our new Dynaudio 8" midbass speakers and flip their polarity respectively. The space behind the pedals and the carpet on the passenger side are usable.
Upper Mid-Bass Installation
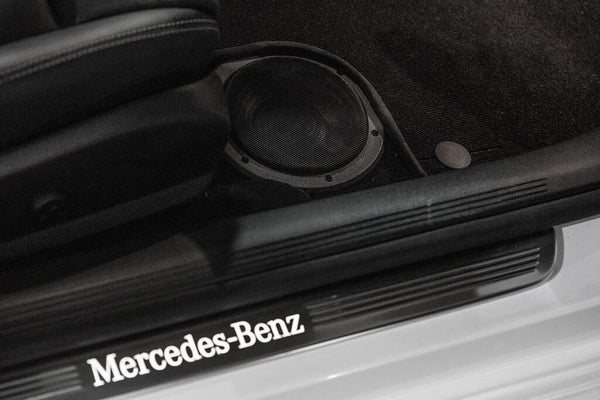
The fourth speaker in the front end is the "upper midbass" Dyanudio Esotar 650. For this we had to come up with a location. There is an option in the front door toward the rear but this was pretty useless. We came up with a location in the floor to potentially reflect from the front screen. The route was to make a fibreglass mould of the floor section. Then we added a top baffle. We opened up the enclosure to use the cross brace section running adjacent and then we sealed this for an ideal 6 ltr capacity.
The carpet was modified to mount through and then the top carpet was modified. Also, we custom made the Alcantara edging to finish the top mat.

Integration and Boot Work
With these wrapped up we moved on to the integration work and rear boot space. As explained above, our integration went in a particularly nice direction. We choose to relocate a number of modules in the boot. The MOST150 loom, fusebox and others. These were re-racked at the back of the boot for quicker access. Rather than behind side panels which will be difficult to gain access to once the boot installation is complete.
Subwoofer Enclosure Build
Our original plan in this Mercedes E400 Audio Upgrade was to include two side enclosures with in-house custom grilles. We however were not familiar with the E400 floor pan. Considering the car is 4-matic we assumed incorrectly the boot floor was a no-go area due to space for the rear diff.
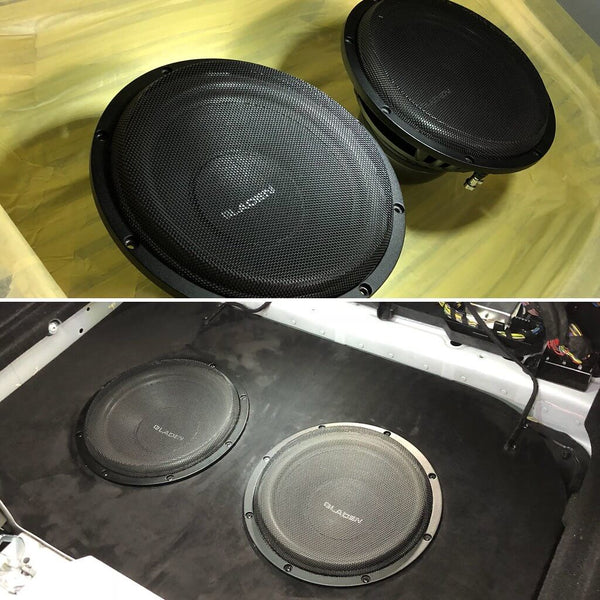
This wasn't the case and the boot floor presented us with a great space for the subwoofer enclosure. We made a custom enclosure in this space to house the two 10" Gladen Audio Aerospace subwoofers.
Amplifier Rack Build
The Sub Enclosure had now been made and the fascia trimmed in black Dynamica. We then started to build the amplifier rack with a "pass-through" design. Also, we mounted the amps above the subwoofer with a cutout section between all of the amplifiers and chamfered to allow airflow.
What governed the cutouts is the displacement of the drivers. Otherwise, we would be creating a strange band-pass fascia to the subwoofer box which we need to avoid. They play freely now through the amp rack. If you look carefully you can see how we chamfered the rear face.
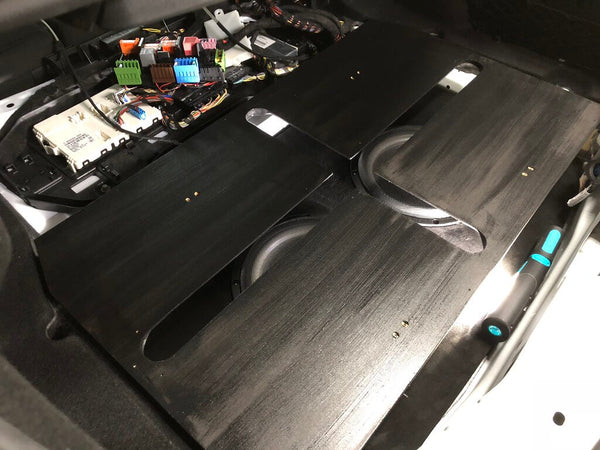
During the design and build of the amp rack, we stripped the amplifiers down and sent the cases over the "H" at H20inc hydro dipping.
We dipped the amplifier cases in a black wood effect finish then coated in a satin lacquer to protect them. This was intentionally done to mirror the black ash finish inside the car. It's difficult to see, but all becomes clear when it catches your eye. Just the type of finish we wanted. See if you can pick it up in the following pictures.
Finishing and Trimming
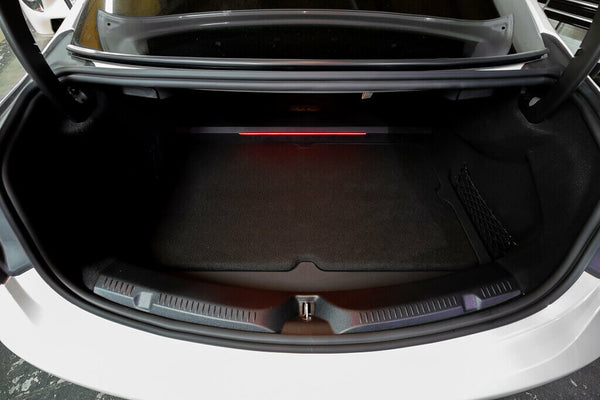
The fabrication was to be in fitting with the car. A nice high end finish with usable space. Complete with load cover for protection, but also something to see for pride of ownership. We love how this installation has turned out from an aesthetic point of view, it goes way beyond the brief.
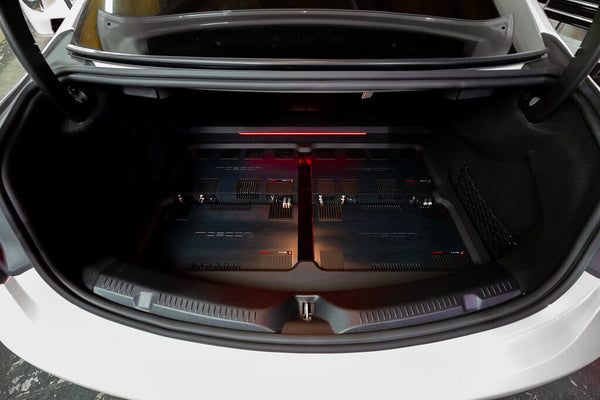
To keep within spec we made a vented load cover. This of course will affect the performance of the subwoofer, which also does need the centre armrest down for maximum effect. We knew this would be the case in this particularly well-sealed coupe. In fact it goes for any coupe, it just varies on the build quality and how open the rear shelf section is.
It's expected to have small compromises like this. The armrest down-load cover off is for that Sunday evening drive when you want to take in everything the system has to offer. At other times you would have to deal with it sounding a few percents off fantastic in the bottom end. The load cover then protects your amplifiers from your laptop bag.
Extra Features
Whilst the system went in, we also installed a Target Blu-eye system for tetra scanning of emergency service vehicles. Warning us of when there are emergency services are around and when we may need to slow down to move out of their way.
Installed alongside this was the Laser Track Flare system, used primarily for opening/closing garage doors.
Summary
It's a simple one to summarise this Mercedes E400 Audio Upgrade due to the kit used. With the right work ethic and the correct customer, the car and its system are nothing short of brilliant. Going back to the first line, our first contact after the car was sent for delivery when complete was an after hours voicemail "Blown away, absolutely brilliant, the best one yet!" Which is more than enough for us.
Whilst running this car in for 20/30 hours on the last week it kept the workshop filled with lovely sound and kept me driving the long way home night after night, which is EXACTLY what this is all about, indulging in your own music at any volume, anywhere.
Enjoy the rest of these photos from Andy at Lurntwubber photographic.
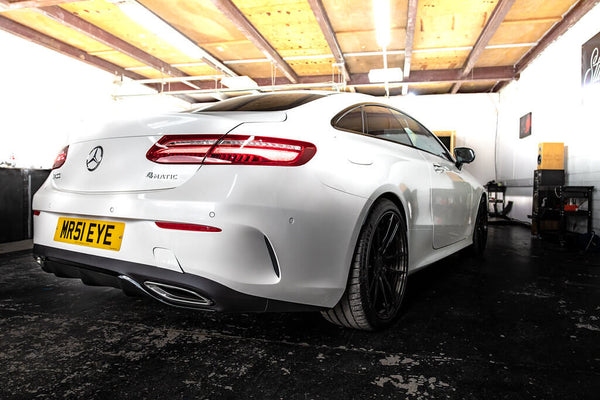
Fun in the bucket load listening to this car. It's a riot to listen to, drive and just to be around. We're chuffed and so is James. Truly a job well done!
As always, sharing via social media is highly appreciated, if you get this far then its worth a share either directly from this page or via our social media links. Many thanks for reading. Hopefully it's helped with either making a decision on your system upgrade or it's helped with ideas for another system?
If you have a Mercedes E400, or any Mercedes for that matter, then we can do a system for it. Please contact us to discuss your ideal system.
- info@studioincar.co.uk
- 01489 578951
Carl Shakespeare


