At Studio Incar, one of the most common vehicles we have come through our doors is the Land Rover Defender. Defender owners often think that because of the simple, rugged and stripped down nature of them, they dont make good platforms for a Defender Sound System Upgrade.
However, our years of experience has allowed us to find solutions to these platforms that give exceptional results.
This blog article is to showcase some of the Defender Sound System Upgrades we have done. Included is a
- Overfinch Defender 90
- Defender 110
- Crew Cab Defender 130
If you have a Land Rover Defender and would like us to fit a sound system upgrade for you, please get in touch with us at info@studioincar.co.uk or call us on 01489 578951.
Defender 90 Overfinch - Sound System Upgrade
Click below to watch our video on the Defender 90 Overfinch
The Defender 90 Overfinch we had in is a lovely piece of kit and we're going to explain what we've done with it.
This Defender has been fully sound deadened and once they have been, it really is quite a cool place to listen to music.
Equipment and Sound Deadening
So we've put a 3-way (Tweeter, Mid-Range & Mid-Bass) front end in this. The equipment list for this project is as follows:
- Hybrid Audio Tweeters
- Rainbow Profi - Mid-Range / Mid-Bass Components
- x2 - JL Audio TW3 12" Subwoofers in custom removable enclosure
- Audison Bit One HD - DSP
- Hertz Mille Power 5 - 5 Channel Amp
- Hertz Mille Power 4 - 4 Channel Amp (Bridged for Mid-Bass)
- Cabling / Distribution / Accessories
We started by deadening the whole car, everything inside has been sound deadened.
The deadening that was completed for this project was as follows:
- Under-Seat Areas
- Rear Floor
- Rear Side Quarters
- Roof
- Sides
- Doors
- Front Floor Area
- 2 layers of deadening for the roof with a thermal layer
3-Way Front End System
The mid-basses are installed in the bottom boxes under the seats, which then acts as an enclosure and really amplifies the mid-bass.
We put the mid-range on a spacer and then used the original grille, so there's a real nice mid-range in there now.
Then up top on the dashboard are upward firing tweeters. Hybrid Audio Tweeters in this one.
A Kenwood head unit was already in the car when we got it, so we've not changed that unit out.
Audison Bit One HD - Unit Placement
In the centre console, which is a little different. We don't usually do this, but the Audison Bit One HD is quite large, so we made a new vented floor inside there and we've put the processor inside this. We put the DRC in there, only to be used for subwoofer control.
Rear Removable Subwoofer Enclosure
The owner Charlie wanted to be able to remove his subwoofer enclosure. Usually on Defenders we will do a centre box, but in this one we put in a couple of JL TW3's in a long Sub enclosure along the rear door, which are on banana plugs to make for easy removal.
System Cost
This system had extensive deadening done, which we would always recommend doing in a Defender. We also do a lot of projects in stages, as not everyone can afford to have a full system built in one go.
This system came in just shy of £9000 when it was done at the backend of 2019. This is definitely towards the top end of what can be done in a Defender, but the results are extraordinary.
Defender 110 - Sound System Upgrade
Click below to watch our video on the Defender 110 Sound System Upgrade
Project Brief and Overview
Here is a brief rundown on what we've done on our client David's Defender 110.
Equipment List
The equipment used in this Defender 110 is as follows:
- Audison AP F8.9bit DSP Amplifier
- Hertz Mille Legend - ML280.3 Tweeters
- Hertz Mille Legend - ML700.3 Midrange
- Hertz Mille Legend - ML1650 Mid-Bass Speakers
- Blaupunkt Bremen SQR 46 DAB - Head Unit
- Audison Prima APBX10 AS - Active Sub Box
The Mid-Bass's were placed under the seats and we treated the enclosure with sound deadening. The Mid-Range speakers were integrated into the glovebox area in a down-firing position and finally, the tweeter on top of the dash pointing towards the windscreen.
The AP F8.9bit DSP was positioned in the underseat enclosure as it provides quite a large amount of unused space that we can utilise.
We also fitted a Blaupunkt Bremen SQR 46 DAB head unit. This is a relatively new product that mimics the original Blaupunkt units of the 80's, but with modern features like USB and DAB.
Rear Active Subwoofer
Handling the subwoofer duties is an Audison APBX 10 AS - Active Sub Box. This small but powerful box allows a small-scale dedicated sub-box to handle low frequency response. This takes the burden off the Mid-Bass speakers, but also enhances the fundamental frequencies for the other components in the system.
Overview
This Defender Sound System Upgrade is a fairly simple system, however its built to a high level. This lends itself perfectly to the Defender platform, which unfortunately starts from such a poor baseline.
As you'll notice in the video, we made all the side panelling and carpeting that is in the back. We also included the lighting to make for a nice environment in the back.
Defender 130 - Sound System Upgrade
Click below to watch our detailed video on this Defender 130 Audio Upgrade.
Introduction and Project Brief
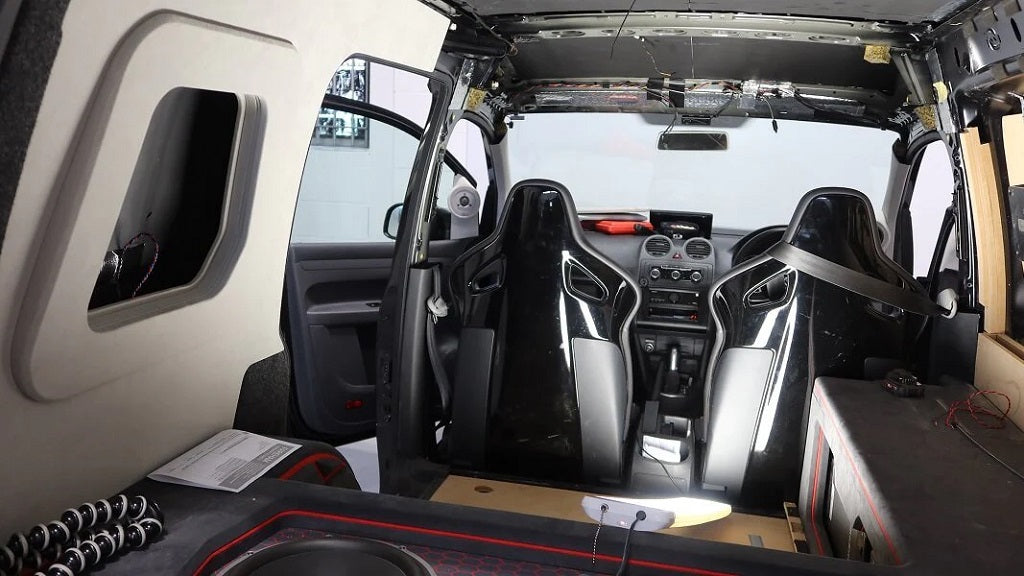
This project sees us working on a Defender 130 Crew Cab, which is not a model we see very often through our workshop.
We are extremely well versed in Defenders, but the 130 doesn't come through often, so we have to change a few things here and there.
Including, but not limited to, mounting our amps in different places and placing the subs in a cool little place.
Equipment List
The equipment used in this Defender 130 is as follows:
- Audison AP F8.9Bit - DSP Amplifier
- Audison AP F1D - Mono Amplifier (For Subwoofers)
- Hertz Mille Legend ML280.3 Tweeters
- Hertz Mille Pro MP 165.3 Mid-Bass Speakers
- Hertz Mille Pro MP 70.3 Mid-Range Speakers
- Audison APS 10 S4S - Slim Subwoofers
Our fabrication / labour for this project will also include the following:
- 3-Way Speaker Installation
- Custom baffles for midrange (OEM grilles to be retained)
- Baffles/modification to front seat area
- Tweeter Installation
- Amplifier Rack in rear seat area
- All cabling (interior removal)
- Custom rear subwoofer enclosure (ported)
- Rack for the bass amplifier (poss twin rack for both)
- Local sound deadening (under-seat boxes / sub box etc)
Equipment Installation and Fabrication
The 3-Way front-end stays the same as the previous defenders mentioned in this article. So that would a 6.5" Mid-Bass under the seats, a 3" Mid-Range under the dash. Finally, a Hertz Mille Legend Tweeter up on the dash pointing towards the windscreen.
This Defender 130 is having a double-din head unit conversion. We are using a fascia panel designed and made by MudUK.
Images below of the Mid-Range and Mid-Bass Speakers in their positions.


Custom Subwoofer Enclosure
The sub enclosure is made out of the existing underseat box. We will use a custom fabricated top plate, which we will bond to the seat box. This will make the box itself a lot less resonant and we will treat the inside with sound deadening.
The equipment to be used in the amp and sub area are two Audison AP10 Subs and a Audison AP F8.9bit DSP amplifier and Audison AP F1D Mono Amplifier.
All the speaker cables from the front-end and source will come down the centre console and we will fabricate a tunnel / cover for them to be protected by. Although Defenders are large, especially the 130, inside space is quite limited. Therefore, we have to get a little creative with how we do things.
The head unit to be used will be the Sony XAV205DB in the custom fascia. Also a button relocation mount will be used to make up for the space lost by the head unit itself.
Images below to show the finished Sub Box Top.


Subwoofer Enclosure Continued...
So once the sub box top plate was done, we modified the box itself by cutting the appropriate speaker holes. We also braced the inside of the box just to give it a bit more internal strength.
Once the top panel is bonded on, it will really help with the resonant frequency of the box.
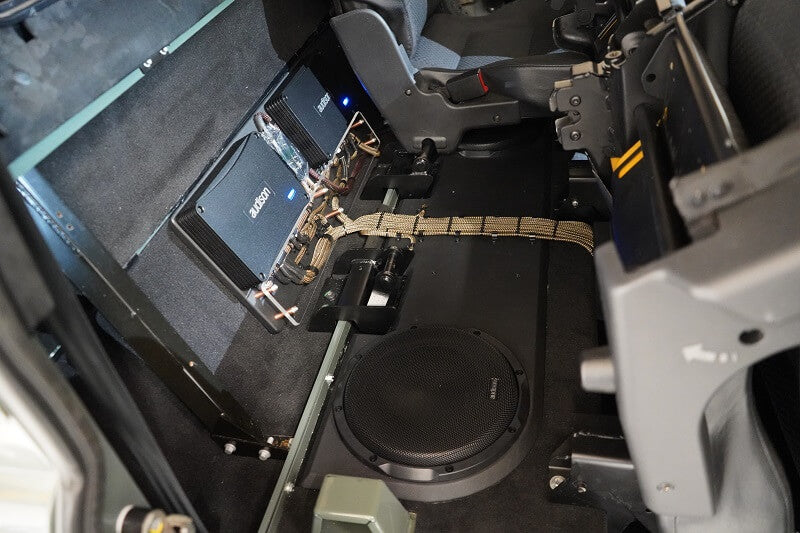
Amplifier Rack and Cable Distribution
The power distribution itself come from the battery, through the bulkhead, and then under the car to come back up to the sub box area.
Our customer Simon requested that we put a spare power cable that runs into the rear load area.
Meanwhile, our man Stu was creating the amp rack, which houses the AP F8.9bit and the new AP F1D mono amp. The AP F1D allows more power and is a closer match to the AP F8.9bit and can be controlled by it too.
Images below of the Amp rack and Cable distribution

With the amp rack built it has all the data and power cabling laid out for the most efficient path. As mentioned before we are building a tunnel for all the cables to be passed through and tied down.
There will be excess length on these cables as we don't like making multiple cuts and solders to cable if we can help it. When dealing with sound any cut and solder is potential for quality loss, so we keep them long.
Images below of the cable distribution tunnel we made.


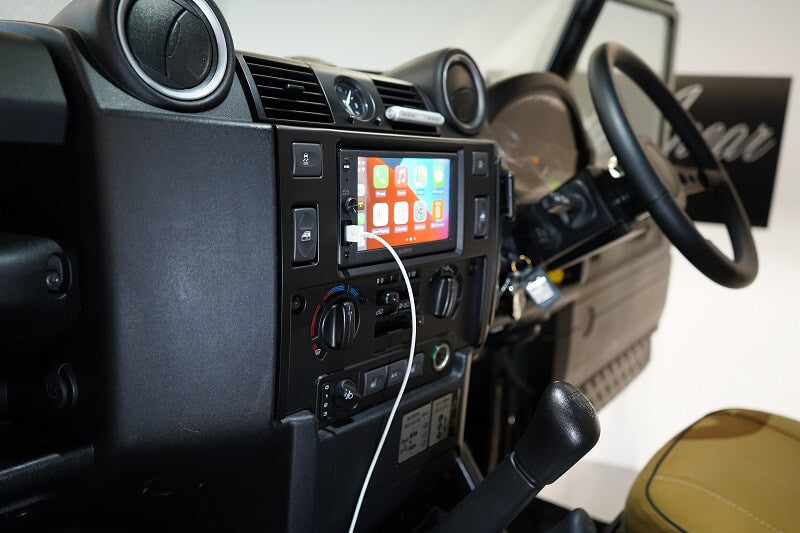
Head Unit Install with Double Din Fascia Conversion
With the 3-way front-end installed we moved onto the fascia panel installation.
There was a small modification made to allow the button relocation panel to fit. Other than that it generally fits in quite easily. Whilst installing the fascia, we also installed a DAB conversion kit to allow the new unit to pick up DAB reception.
Images below of the finished fascia kit with an interim head unit installed.

Finale
Hopefully this blog article has given you an insight on how we treat the Defenders that come through our workshops. We would happily be put on record that we can make the best sounding defenders.
We would love to hear from you if you have a Defender and want a Sound System Upgrade done. We are happy to go basic and simple, yet good quality, all the way up to 5-figure systems and anything in between.
Contact us on the following to get in touch:
- Email: info@studioincar.co.uk
- Phone: 01489 578951